Wednesday 27 March 2013

Determine execution time in PHP File


Determine execution time in PHP File


This code will determine the time taken for a php script to execute correct to 0.000000000000001 seconds.

<!-- put this at the top of the page --> 
<?php 
   $mtime = microtime(); 
   $mtime = explode(" ",$mtime); 
   $mtime = $mtime[1] + $mtime[0]; 
   $starttime = $mtime; 
?> 

<!-- put other code and html in here -->


<!-- put this code at the bottom of the page -->
<?php 
   $mtime = microtime(); 
   $mtime = explode(" ",$mtime); 
   $mtime = $mtime[1] + $mtime[0]; 
   $endtime = $mtime; 
   $totaltime = ($endtime - $starttime); 
   echo "This page was executed in  ".$totaltime."  seconds"; 
?>


Thursday 7 March 2013

Sending HTML Email through PHP

Sending HTML Email through PHP uses the exact same mail function as text email:


<?php
// PREPARE THE BODY OF THE MESSAGE

$message = '<html><body>';
$message.= '<img src="your image" alt="Email Template" />';
$message.= '<table rules="all" style="border-color: #666;" cellpadding="10">';
$message.= "<tr style='background: #eee;'><td><strong>Name:</strong> </td><td>PatrioSys</td></tr>";
$message.= "<tr><td><strong>Email:</strong> </td><td>email@email.com</td></tr>";
$message.= "<tr><td><strong>Your Text:</strong> </td><td>Hello</td></tr>";
$message.= "<tr><td><strong>Comment:</strong> </td><td>Welcome</td></tr>";
$message.= "<tr><td><strong>TEST:</strong> </td><td>SUCCESS</td></tr>";
$message.= "</table>";
$message.= "</body></html>";
          
//   CHANGE THE BELOW VARIABLES TO YOUR NEEDS
         
$to = 'softmanicadmin@gmail.com';
//Subject of your Mail
$subject = 'Send HTML Mail Using PHP';
$headers = "From: yourmail@gmail.com\r\n";
$headers.= "Reply-To: CCmail@gmail.com\r\n";
$headers.= "MIME-Version: 1.0\r\n";
$headers.= "Content-Type: text/html; charset=ISO-8859-1\r\n";
//This function will send mail
if (mail($to, $subject, $message, $headers)) {
echo 'Your message has been sent.';
} else {
echo 'There was a problem sending the email.';
}

?>

That's it!

Thursday 14 February 2013

Export MySQL to Excel Using PHP

Export MySQL to Excel Using PHP

The code below will export every column name and value from your database into an excel document.
Note: Delete the line spaces if you receive a parse error.

<?php
/*******EDIT LINES TO CONFIGURE YOUR DB*******/
$DB_Server = "localhost"; //MySQL Server 
$DB_Username = "username"; //MySQL Username 
$DB_Password = "password"; //MySQL Password 
$DB_DBName = "databasename"; //MySQL Database Name 
$DB_TBLName = "tablename"; //MySQL Table Name
$filename = "excelfilename"; //File Name

/*******YOU DO NOT NEED TO EDIT ANYTHING BELOW THIS LINE*******/

//create MySQL connection
$sql = "Select * from $DB_TBLName";

$Connect = @mysql_connect($DB_Server, $DB_Username, $DB_Password) or die("Couldn't connect to MySQL:<br>" . mysql_error() . "<br>" . mysql_errno());

//select database
$Db = @mysql_select_db($DB_DBName, $Connect) or die("Couldn't select database:<br>" . mysql_error(). "<br>" . mysql_errno());

//execute query
$result = @mysql_query($sql,$Connect)or die("Couldn't execute query:<br>" . mysql_error(). "<br>" . mysql_errno());

$file_ending = "xls";
//header info for browser
header("Content-Type: application/xls");
header("Content-Disposition: attachment; filename=$filename.xls");
header("Pragma: no-cache");
header("Expires: 0");
 
/*******Start of Formatting for Excel*******/
//define separator (defines columns in excel & tabs in word)
$sep = "\t"; //tabbed character
//start of printing column names as names of MySQL fields
for ($i = 0; $i < mysql_num_fields($result); $i++)
{
echo mysql_field_name($result,$i) . "\t";
}
print("\n");

//end of printing column names
//start while loop to get data
    while($row = mysql_fetch_row($result))
    {
        $schema_insert = "";
        for($j=0; $j<mysql_num_fields($result);$j++)
        {
            if(!isset($row[$j]))
                $schema_insert .= "NULL".$sep;
            elseif ($row[$j] != "")
                $schema_insert .= "$row[$j]".$sep;
            else
                $schema_insert .= "".$sep;
        }
        $schema_insert = str_replace($sep."$", "", $schema_insert);
$schema_insert = preg_replace("/\r\n|\n\r|\n|\r/", " ", $schema_insert);
        $schema_insert .= "\t";
        print(trim($schema_insert));
        print "\n";
    }
?>

Monday 4 February 2013

Creating Custom Html Modules

Creating Custom Html Modules  for Joomla 1.5


To create custom modules as I have them in templates such as Joomlatemplate.
I am going to assume you know how to use the basics of Joomla administration.

1: Login into your Joomla administrator area.

2: Select Extensions > Module Manager.


3: Now to your right you will see a menu option called New. Click this menu item.


4: Select the CUSTOM HTML option.


5: Complete the following tasks in the details section.
  • - In the Title Box give your custom module a name eg: History.
  • - Select show title if you want.
  • - Select enabled to YES or No.
  • - Position to  example: User1.


6: In menu assignment select the menu items where you would like your module to show up.  If you just want to select specific menu items select the SELECT MENU ITEMS FROM LIST option.  Hold down the ctrl button on your keyboard and select the menu items where you want to display your custom module.


7: Add whatever text or image(s) links you want in your custom module. This data should be entered in the Custom Output area as shown below.  It is the exact same procedure as writing an article for your site. Click preview at the top right of your screen to preview your custom module.Click save at the top right area of the screen.


Congrats! Your have created Custom Joomla module. 


Create a Module for Joomla 2.5

Create a Custom Joomla 2.5 Module

In this tutorial we will create a "Actual Database Driven and Dynamic Module".The module we will create will interact with the database and give us a list of registered users on the site.

Creating the folder and file structure

There is a strict file/folder structure when creating any kind of Joomla extension. Create the files and folders below using your favorite code editor or IDE. If you don't have this, use Notepa.. Create the main folder which will be called  "mod_siteusers". Then create the files/folders below.

Important: In order for the module to work, the mod_siteusers folder needs to be in your Joomla sites "Modules" folder BUT do not put it there yet because we need to create everything first then pack it in a zip file to install via Joomla admin area.

mod_siteusers   (The main folder name, Place the below files inside this folder)
-mod_siteusers.xml
-mod_siteusers.php
-helper.php
-index.html
--tmpl (folder)
--tmpl/default.php
--tmpl/ordered_list.php
--tmpl/index.html
Lets go through each file one by one...please read the comments in the code as well.

mod_siteusers.xml
This file holds all of the modules metadata, information and parameters.
The file structure must be exact.


<?xml version="1.0" encoding="utf-8"?>
<extension type="module" version="1.6.0" client="site" method="install">
<name>Site Users</name> 
<author>PatrioSys</author> 
<creationDate>2013</creationDate> 
<copyright>All rights reserved by PatrioSys.</copyright> 
<license>GPL 2.0</license> 
<authorEmail>
 info@softmanic.com</authorEmail> 
<authorUrl>www.softmanic.com</authorUrl> 
<version>1.0.0</version> 
<description>Provides a listing of registered users</description>
    <!-- Listing of all files that should be installed for the module to function -->
<files>
        <!-- The "module" attribute signifies that this is the main controller file -->
<filename module="mod_siteusers">mod_siteusers.php</filename>
<filename>index.html</filename>
<filename>helper.php</filename>
<filename>tmpl/default.php</filename>
                <filename>tmpl/ordered_list.php</filename>
<filename>tmpl/index.html</filename>
</files>
    <languages>
        <!-- Any language files included with the module -->
        <language tag="en-GB">en-GB.mod_siteusers.ini</language>
    </languages>
    <!-- Optional parameters -->
<config>
            <fields name="params">
                <fieldset name="basic">
                    <field 
                        name="moduleclass_sfx" 
                        type="text" 
                        default="" 
                        label="LABEL_CLASS_SUFFIX" 
                        description="DESC_MOD_SUFFIX">
                    </field>
                     <field 
                        name="@spacer" 
                        type="spacer" 
                        default="" 
                        label="" 
                        description="">
                    </field>
                     <field 
                        name="usercount" 
                        type="text" 
                        default="5" 
                        label="LABEL_USER_COUNT" 
                        description="DESC_USER_COUNT">
                    </field>
                     <field 
                        name="layout" 
                        type="list" 
                        default="default" 
                        label="LABEL_USER_LAYOUT" 
                        description="DESC_USER_LAYOUT">
                       <option
value="default">Unordered List</option>
<option
value="ordered_list">Ordered List</option>
                    </field>
                </fieldset>
            </fields>
    </config>
</extension>

Feel free to change the personal info. One thing you should look at here is the "<field> tags. These are the parameters that are on the right hand side when viewing your module in modlue manager. Here we have 4. The first is the "module class suffix" which all modules have. The suffix the user adds here will be attached to the modules css class so you can style individual modules. The second is just a simple "spacer". The third is the number of users you wish to display in the module and finally, the fourth is the layout option. You can have multiple layouts for one module. Each layout should go in the tmpl folder. Our 2 options here is the default, which is an unordered list with the "Website Users" description at the top. The ordered_list layout uses a numbered list and no description at the top. The changes are very subtle but I just wanted to show you a simple example.

Another thing you might be looking at is the uppercase constants like "LABEL_USER_COUNT". These are used with the language file that will be included later.

mod_siteusers.php
This file acts as a controller directing the functions and files
<?php

//No access
define('_JEXEC') or die('Direct Access to this Location is not allowed.');


//This is the parameter we get from the XML file 

$userCount= $params->get('usercount');


//Include syndicate function only once

require_once dirname(__FILE__).'/helper.php';


//Require the path of the layout file

require JModuleHelper::getLayoutPath('mod_siteusers', $params->get('layout','default'));
helper.php
This is the main workhorse model that handles the business logic


<?php

//No access

define('_JEXEC') or die;


//Add database instance

$db= JFactory::getDBO();


//Pass query Limit by usercount parameter (Check XML)

$query="SELECT name FROM #__users LIMIT {userCount}";


//Run The query

db->setQuery($query);


//Load it as an Object into the variable "$rows
$rows = $db->loadObjectList();
This file runs the query and selects the user "names" from the #__users table and limits the number of returned rows to whatever the user sets as the "user count" param from module manager. This query will then be loaded using the "loadObjectsList method and put in the $rows variable which we can now loop through in our default.php layout file below.

index.html
<html><body bgcolor="#FFFFFF"></body></html>
This html file is strictly used to prevent users from accessing the module files directly.

tmpl/default.php
<?php define('_JEXEC') or die('Restricted access'); ?>
<p><?php echo JText::_('DESC_MODULE'); ?></p>
<ul>
<?php foreach($rows as $row){?>
<li>
<?php echo JText::sprintf('USER_LABEL',$row->name);?> 
</li>
<?php } ?>
</ul>

The default.php file is the modules "default view". It is in charge of displaying the module to the user. It is essentially html with php includes and loops. This file performs a foreach loop to diaplay the $rows array which is the array of users..

To select more than one field just add them to your query after "email" or use an asterisk(*) to select ALL fields on that table.

SELECT email,field2,fi eld3 FROM #__users LIMIT....
OR
SELECT * FROM #__users LIMIT
Ex: $row->name,$row->email,$row->field2 ..........

tmpl/ordered_list.php
<?php define('_JEXEC') or die('Restricted access'); ?>
<ol>
<?php foreach($rows as $row){?>
<li>
<?php echo JText::sprintf('USER_LABEL',$row->name;?>
</li>
<?php } ?>
</ol>

This is the "ordered list" layout. As stated above, the only difference is that it uses a numbered list and has no description parameter.

tmpl/index.html
<html><body bgcolor="#FFFFFF"></body></html>
Same as above, it is used to prevent users from accessing the module files directly

Now that all of your files are created, add the entire "mod_siteusers" folder to a zip file using whatever zip program you use (winzip, winrar, 7zip, etc).


Congrats! Your first Joomla module is complete. Lets try it out!

Login to your Joomla admin area and go to the extension manager. From the "install" section  browse and upload the zip file. You should get a "Successful Install" message.
Extension Manager in Joomla 2.5

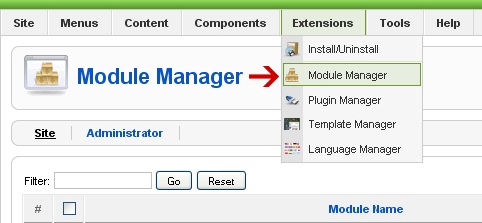
Now go to the "Module Manager" and you should see your module. click on the title. Now you should see the properties of the module. You should see all your parameters on the right hand side. You can change the number of users to be displayed as well as the layout. Now make sure it is published and use the desired module position in your template.


Visit your frontend and you should see a list of your website users.

This is just a very simple module. You can use this framework to show anything from the database such as articles and more. You can also choose to display users email addresses, username, etc and could add links
to this list items.

Image Upload and Cropping with PHP.

Image Upload and Cropping with PHP and Jquery


Users
Contains user details username, password, email, profile_image and profile_image_small etc.
CREATE TABLE `users` (
`uid` int(11) AUTO_INCREMENT PRIMARY KEY,
`username` varchar(255) UNIQUE KEY,
`password` varchar(100),
`email` varchar(255) UNIQUE KEY,
`profile_image` varchar(200),
`profile_image_small` varchar(200),
)

index.php
Contains PHP code uploading image into uploads folder physical location and image path updating in users table set profile_image.
<?php
include('db.php');
session_start();
$session_id=$_SESSION['user'];//  Session ID
$path = "uploads/";
$valid_formats = array("jpg", "png", "gif", "bmp");
if(isset($_POST['submit']))
{
$name = $_FILES['photoimg']['name'];
$size = $_FILES['photoimg']['size'];
if(strlen($name))
{
list($txt, $ext) = explode(".", $name);
if(in_array($ext,$valid_formats) && $size<(250*1024))
{
$actual_image_name = time().substr($txt, 5).".".$ext;
$tmp = $_FILES['photoimg']['tmp_name'];
if(move_uploaded_file($tmp, $path.$actual_image_name))
{
mysql_query("UPDATE users SET profile_image='$actual_image_name' WHERE uid='$session_id'");
$image="<h1>Please drag on the image</h1><img src='uploads/".$actual_image_name."' id=\"photo\" ";
}
else
echo "failed";
}
else
echo "Invalid file formats..!"; 
}
else
echo "Please select image..!";
}
?>
//HTML Body
<?php echo $image; ?>
<div id="thumbs" ></div>
<div >
<form id="cropimage" method="post" enctype="multipart/form-data">
Upload your image <input type="file" name="photoimg" id="photoimg" />
<input type="hidden" name="image_name" id="image_name" value="<?php echo($actual_image_name)?>" />
<input type="submit" name="submit" value="Submit" /> 
</form>

Javascript
$(“img#photo”).imgAreaSelect() - here photo is the ID name of image block and calling imgAreaSelect function for cropping image.


<script type="text/javascript" src="http://ajax.googleapis.com/ajax/libs/jquery/
1.4.2/jquery.min.js"></script>
<script type="text/javascript" src="scripts/jquery.imgareaselect.pack.js"></script>
<script type="text/javascript">
function getSizes(im,obj)
{
var x_axis = obj.x1;
var x2_axis = obj.x2;
var y_axis = obj.y1;
var y2_axis = obj.y2;
var thumb_width = obj.width;
var thumb_height = obj.height;
if(thumb_width > 0)
{
if(confirm("Do you want to save image..!"))
{
$.ajax({
type:"GET",
url:"ajax_image.php?t=ajax&img="+$("#image_name").val()+"&w="+
thumb_width+"&h="+thumb_height+"&x1="+x_axis+"&y1="+y_axis,
cache:false,
success:function(rsponse)
{
$("#cropimage").hide();
$("#thumbs").html("");
$("#thumbs").html("<img src='uploads/"+rsponse+"' />");
}
});
}
}
else
alert("Please select portion..!");
}
$(document).ready(function () 
{
$('img#photo').imgAreaSelect({
aspectRatio: '1:1',
onSelectEnd: getSizes
});
});
</script>

ajax_image.php

Contains simple PHP code, resizing cropped image into 100 x 100 pixel and updating into users table profile_image_small. 
<?php
include('db.php');
session_start();
$session_id=$_SESSION['user']; // Or Session ID
$t_width = 100; // Maximum thumbnail width
$t_height = 100; // Maximum thumbnail height
$new_name = "small".$session_id.".jpg"; // Thumbnail image name
$path = "uploads/";
if(isset($_GET['t']) and $_GET['t'] == "ajax")
{
extract($_GET);
$ratio = ($t_width/$w); 
$nw = ceil($w * $ratio);
$nh = ceil($h * $ratio);
$nimg = imagecreatetruecolor($nw,$nh);
$im_src = imagecreatefromjpeg($path.$img);
imagecopyresampled($nimg,$im_src,0,0,$x1,$y1,$nw,$nh,$w,$h);
imagejpeg($nimg,$path.$new_name,90);
mysql_query("UPDATE users SET profile_image_small='$new_name' WHERE uid='$session_id'");
echo $new_name."?".time();
exit;
}
?>
db.php
PHP database configuration file:
<?php
$mysql_hostname = "Host name";
$mysql_user = "UserName";
$mysql_password = "Password";
$mysql_database = "Database Name";
$bd = mysql_connect($mysql_hostname, $mysql_user, $mysql_password) or die("Could not connect database");
mysql_select_db($mysql_database, $bd) or die("Could not select database");
?>

Add New MySQL User

Add New MySQL User

For adding a new user to MySQL you just need to add a new entry to user table in database mysql. Below is an example of adding new user phpcake with SELECT, INSERT and UPDATE privileges with the password mypass the SQL query is :

mysql> use mysql;
Database changed
mysql> INSERT INTO user (host, user, password, select_priv, insert_priv, update_priv) VALUES ('localhost', 'phpcake', PASSWORD('mypass'), 'Y', 'Y', 'Y');
Query OK, 1 row affected (0.20 sec)

mysql> FLUSH PRIVILEGES;
Query OK, 1 row affected (0.01 sec)

mysql> SELECT host, user, password FROM user WHERE user = 'phpcake';
+-----------+---------+------------------+
| host      | user    | password         |
+-----------+---------+------------------+
| localhost | phpcake | 6f8c114b58f2ce9e |
+-----------+---------+------------------+
1 row in set (0.00 sec)

When adding a new user remember to encrypt the new password using PASSWORD() function provided by MySQL. As you can see in the above example the password mypass is encrypted to 6f8c114b58f2ce9e.

Notice the the FLUSH PRIVILEGES statement. This tells the server to reload the grant tables. If you don't use it then you won't be able to connect to mysql using the new user account (at least until the server is reloaded).

You can also specify other privileges to a new user by setting the values of these columns in user table to 'Y' when executing the INSERT query :
  • Select_priv
  • Insert_priv
  • Update_priv
  • Delete_priv
  • Create_priv
  • Drop_priv
  • Reload_priv
  • Shutdown_priv
  • Process_priv
  • File_priv
  • Grant_priv
  • References_priv
  • Index_priv
  • Alter_priv
I think you can guess what those privileges serve by reading it's name.

Using PHP to Backup MySQL

Using PHP to Backup MySQL Databases

There are at least three ways to backup your MySQL Database :
  1. Execute a database backup query from PHP file.
  2. Run mysqldump using system() function.
  3. Use phpMyAdmin to do the backup.
 Execute a database backup query from PHP file


Save document below with name ‘config.php’.
<?php
$hostname = 'localhost';     
$dbname   = 'phpmysimplelogin'; // Your database name.
$username = 'root';             // Your database username.
$password = '';                 // Your database password.
mysql_connect($hostname, $username, $password) or DIE('Connection to host is failed');
// Select the database
mysql_select_db($dbname) or DIE('Database name is not available!');
?>

Below is an example of using SELECT INTO OUTFILE query for creating table backup :
<?php
include 'config.php';
$tableName  = 'mypet';
$backupFile = 'backup/mypet.sql';
$query      = "SELECT * INTO OUTFILE '$backupFile' FROM $tableName";
$result = mysql_query($query);
include 'closedb.php';
?>

To restore the backup you just need to run LOAD DATA INFILE query like this :
<?php
include 'config.php';
$tableName  = 'mypet';
$backupFile = 'mypet.sql';
$query      = "LOAD DATA INFILE 'backupFile' INTO TABLE $tableName";
$result = mysql_query($query);
include 'closedb.php';
?>
It's a good idea to name the backup file as tablename.sql so you'll know from which table the backup file is

Run mysqldump using system() function

The system() function is used to execute an external program. Because MySQL already have built in tool for creating MySQL database backup (mysqldump) let's use it from our PHP script.
<?php
include 'config.php';
$backupFile = $dbname . date("Y-m-d-H-i-s") . '.gz';
$command = "mysqldump --opt -h $dbhost -u $dbuser -p $dbpass $dbname | gzip > $backupFile";
system($command);
include 'closedb.php';
?>

Use phpMyAdmin to do the backup:

This option as you may guessed doesn't involve any programming on your part. However I think i mention it anyway so you know more options to backup your database.

To backup your MySQL database using phpMyAdmin click on the "export" link on phpMyAdmin main page. Choose the database you wish to backup, check the appropriate SQL options and enter the name for the backup file.